
5 Steps to Create a Custom Event Menu
-
- November 28, 2025
- Uncategorized
- 20 mins read
Creating a custom event menu ensures your guests enjoy a meal tailored to their tastes and needs while aligning with your event’s theme and goals. Here’s a quick breakdown:
- Define Your Event Purpose and Guest Profile: Understand your event type, theme, guest demographics, and preferences to guide decisions on service style, ingredients, and budget.
- Assess Dietary Requirements: Gather dietary restrictions through RSVPs, offer diverse menu options, and ensure clear communication with the restaurant about preparation practices.
- Collaborate with the Restaurant: Choose a group-friendly venue, share event details upfront, and work with their team to align the menu with your goals and budget.
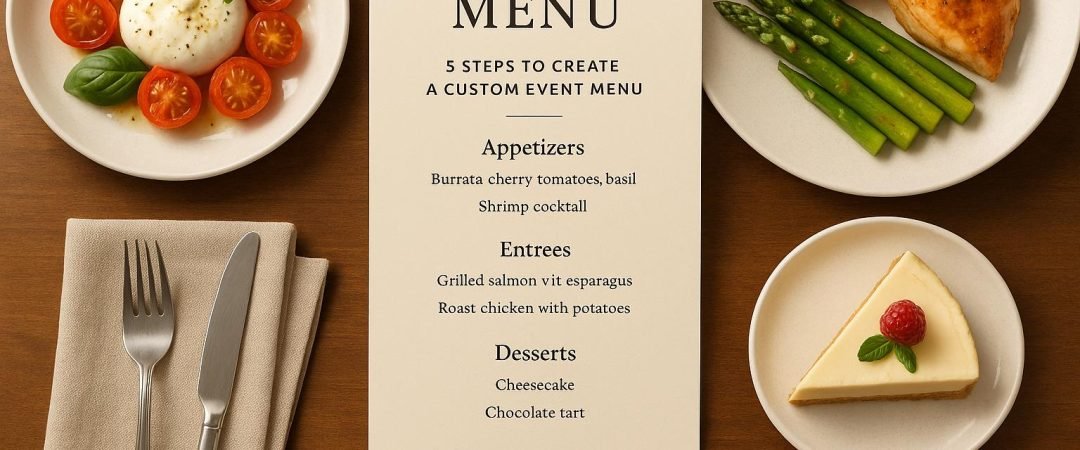
- Organize the Menu: Structure the menu into clear sections, balance variety with simplicity, and ensure descriptions are easy to understand with allergen details included.
- Test and Finalize: Conduct tasting sessions, gather feedback, and confirm all details with the restaurant at least 7–10 days before the event.
How to Plan a Menu for an Event: Expert Tips and Tricks!
Step 1: Define Your Event Purpose and Guest Profile
Before diving into menu discussions with a restaurant, it’s essential to have a clear vision for your event and a solid understanding of your guests. These foundational details will shape decisions about service style, ingredients, and budget.
Identify the Event Type and Theme
The nature of your event plays a big role in determining how formal or casual your menu should be. For example, corporate dinners and business meetings often call for professional plated meals with balanced options that cater to a broad audience.
On the other hand, weddings and milestone celebrations offer more room for creativity. These events often feature menus that reflect family traditions or meaningful experiences. If you’re hosting a themed gathering, you can design a menu around specific ingredients, global cuisines, or even seasonal flavors. Whether it’s a cuisine-focused event or a seasonal celebration, the theme will guide both ingredient choices and presentation style. For social events like private parties, you have the flexibility to explore buffet service, food stations, or even interactive dining setups.
Your event type also influences the service style – whether you go with plated meals, buffets, or food stations – and helps strike the right balance between efficiency, elegance, and entertainment. When working with your restaurant partner, clearly communicate the atmosphere you’re aiming for. Share details like the mood, color schemes, and design elements to help them understand your vision.
Once your event theme is set, it’s time to focus on your guests and their preferences.
Understand Guest Demographics and Preferences
Your guests’ tastes and needs will shape the menu. Start by gathering details about their age groups, cultural backgrounds, dietary preferences (like vegetarian, vegan, gluten-free, or allergy concerns), and the context of the event, especially for corporate occasions. Sending invitations three to four weeks in advance with a section for dietary restrictions can help you collect this information. Be sure to follow up about a week before the event to catch any last-minute updates.
For events with a diverse group of attendees, it’s helpful to identify a central purpose for the menu while remaining flexible to individual needs. Look for common threads among your guests – whether it’s shared cuisines, dining styles, or dietary values – to create a menu that feels cohesive and inclusive.
With your event theme and guest profile in place, the next step is to nail down the guest count and ensure the venue can handle it.
Estimate Guest Count and Venue Capacity
Knowing your guest count is critical for planning everything from venue size to food portions and overall costs. Underestimating attendance can lead to food shortages and service hiccups, while overestimating could strain your budget and waste resources.
Your guest count also determines which restaurants can accommodate your group. Many venues have specific limits for private dining spaces, so check their capacity details carefully when booking through platforms like GroupMenus. This ensures the restaurant aligns with both your group size and the type of service you envision.
The size of your group also affects the menu’s complexity. Larger gatherings often work better with simpler setups like buffets or food stations, while smaller groups can enjoy more intricate plated meals. Venue characteristics also come into play. For example, intimate spaces might call for passed appetizers or food stations, while outdoor settings can lend themselves to casual formats like food bars or family-style service.
Providing an accurate guest count early on helps restaurants plan effectively. It also allows them to suggest menu options that balance quality and cost. Be upfront about your budget during initial consultations, including food costs, service fees, taxes, and any special requests. Most caterers request a final headcount about seven to ten days before the event to finalize their preparations. By communicating your financial parameters early, your restaurant partner can craft menus that maximize value, incorporating seasonal ingredients and efficient menu designs.
Step 2: Assess Dietary Requirements and Preferences
After defining your event’s purpose and understanding your guest profile, the next step is to address dietary restrictions and preferences. This ensures every guest feels included and can enjoy their meal without worry.
Collect Dietary Information
Make it easy for guests to share their dietary needs by including a dedicated section in your RSVP. Send invitations three to four weeks before the event to give your restaurant partner enough time to adjust the menu or source specialty ingredients. In the RSVP, list common dietary restrictions – like vegetarian, vegan, gluten-free, dairy-free, or nut allergies – and leave space for guests to add specific details.
Use digital tools, such as forms or surveys, to organize this information into a clear and shareable format for the restaurant’s kitchen team. Avoid vague questions like "Do you have any dietary restrictions?" Instead, provide predefined options with an open-ended field for additional notes.
If some guests haven’t responded a week before the event, follow up to ensure you have all the necessary details. For corporate gatherings or business events, collecting dietary preferences should be part of your initial planning. A digital checklist or spreadsheet – tracking names, types of restrictions (allergy vs. preference), and special requests – can help you stay organized and prevent oversights. Sharing this document with your restaurant partner establishes clear communication and accountability.
When discussing dietary requirements with the restaurant, make sure to address food preparation practices. Ask them to label dishes clearly and take precautions to avoid cross-contamination. For example, they might need to set up designated preparation areas or use color-coded plates for guests with severe allergies. Request documentation on how they plan to handle special requests, like gluten-free or vegan dishes, and confirm their ability to safely accommodate severe allergies.
Use the information you’ve gathered to create menu alternatives that cater to everyone’s needs.
Include Multiple Menu Options
With dietary details in hand, design a menu that offers a variety of options.
Incorporate vegetarian, vegan, gluten-free, and allergen-free dishes that also respect religious or personal dietary practices. Instead of viewing restrictions as obstacles, see them as a chance to explore creative culinary solutions. Work with experienced restaurants that can adapt signature dishes or create new ones that complement your event’s theme.
Make sure the alternatives match the quality and thoughtfulness of the main menu. Balance healthy choices, like salads and lean proteins, with comforting options such as gourmet sliders or sandwiches. Some guests may have overlapping restrictions – like being both vegan and gluten-free – so it’s important to address these combinations thoughtfully.
During your menu tasting, sample the dietary-specific dishes alongside the standard offerings. Discuss preparation methods with your restaurant partner and confirm how they’ll prevent cross-contamination. If any last-minute changes arise after your RSVP deadline, communicate these updates to your restaurant partner immediately and document any adjustments.
Step 3: Collaborate with the Restaurant on Menu Development
Once you’ve nailed down your event’s purpose and dietary considerations, it’s time to team up with a restaurant to design a menu that fits your vision. The goal here is to strike the perfect balance between creativity, practicality, and budget while keeping your guests’ needs front and center.
Choose Group-Friendly Restaurants
Start by focusing on venues that have experience hosting group events and offer flexible private spaces. It’s important to pick a restaurant that can comfortably handle your guest count and has a proven track record of accommodating group dining.
When evaluating options, prioritize restaurants that are open to customizing their menu. Some venues can tweak existing dishes to suit your event, while others might work with you to create entirely new options. Be sure to ask about their consultation process. Many restaurants will want to know the type of event you’re hosting, your audience, and your goals before offering menu suggestions.
If you’re not sure where to begin, platforms like GroupMenus can simplify your search. These tools provide a database of restaurants that cater to group events, including details on capacity, private dining spaces, and amenities. They also connect you directly with restaurant contacts, making it easier to narrow down your choices based on your specific needs.
When reaching out to potential venues, share essential details upfront: your guest count, dietary restrictions, budget range, and event timeline. This helps the restaurant craft proposals that align with your needs. Ask about their ability to handle last-minute changes, source specialty ingredients, or adjust portion sizes. It’s also critical to confirm how they manage severe allergies and special requests like gluten-free or vegan options. This ensures their kitchen team can distinguish between general preferences and medical necessities.
Once you’ve chosen a venue that aligns with your vision, the next step is to fine-tune the menu to meet your event’s goals and budget.
Align Menu with Event Goals and Budget
After selecting a restaurant, work closely with their culinary team to design a menu that reflects your event’s theme, objectives, and financial guidelines. Establish a clear per-person budget that includes service fees and taxes to help guide the decision-making process.
Be specific about the type of event you’re hosting – whether it’s a corporate dinner, networking session, workshop, or celebration – as this will influence the menu style and presentation. For example, networking events might benefit from bite-sized appetizers that encourage mingling, while formal dinners may call for plated meals to add a touch of elegance.
The service style you choose will also play a key role in shaping the atmosphere and cost. Buffets are typically more budget-friendly, while plated meals add sophistication. If you’re looking for something interactive, consider food stations that allow guests to customize their meals – these can create a memorable dining experience. Think about which format best suits your event’s flow and budget.
To keep costs in check while maintaining quality, incorporate seasonal and locally sourced ingredients. Don’t hesitate to ask the chef for alternative ingredient suggestions or preparation methods that align with your budget. Being upfront about your financial limits allows the restaurant to propose options that work within your parameters.
Discuss potential trade-offs, like offering fewer menu choices to streamline preparation and control expenses. Ask for a clear breakdown of pricing across menu components – appetizers, entrees, desserts, and beverages – so you understand how your budget is being allocated. If necessary, use data or examples to negotiate adjustments or discounts.
Aim for a menu that caters to a variety of tastes by balancing healthy options like salads and lean proteins with comfort foods such as gourmet sliders or sandwiches. For guests with overlapping dietary restrictions (e.g., vegan and gluten-free), work with the chef to craft dishes that address multiple needs without requiring entirely separate meals.
Schedule a menu tasting early in the planning process and invite key decision-makers to finalize selections. Use this opportunity to discuss preparation techniques, ingredient sourcing, and plating options. You can also get recommendations on garnishes and serving styles that align with your event’s tone and formality.
Finally, confirm all details in writing. This includes meal schedules, food presentation, service style, and any special requests. Use digital tools like email confirmations or shared documents to keep everyone on the same page. Clear communication with the restaurant throughout the planning process will help avoid any last-minute surprises.
sbb-itb-5436e91
Step 4: Structure and Organize the Menu
Once you’ve worked with the restaurant to craft the menu, the next step is to organize it into a format that’s easy to read and navigate. A well-structured menu not only helps guests make quick, informed decisions but also ensures smooth operations for the kitchen and service team. How you present the menu can directly influence the overall event experience.
Categorize Menu Items
Start by breaking the menu into clear sections to help guests find what they’re looking for. For formal sit-down events, stick to traditional categories like appetizers, soups or salads, main courses, sides, and desserts. This familiar layout makes it easy for guests to understand what’s available and simplifies the ordering process.
For more casual events, such as networking gatherings or cocktail receptions, consider grouping items differently. Focus on sections like finger foods, passed hors d’oeuvres, or light bites, and organize these by ingredients or preparation styles. This approach works well when guests will be mingling and eating on the move.
Think about the flow of the event when deciding the sequence of dishes. Lighter appetizers should come before heavier main courses, and if your menu includes rich dishes, consider interspersing palate-cleansing options. This progression not only enhances the dining experience but also makes service more efficient.
Timing is another key factor. For corporate workshops or events with presentations, plan meals around natural breaks in the schedule to avoid interruptions. At formal dinners with speeches, coordinate the timing of each course so it doesn’t interfere with key moments. These considerations ensure the meal fits seamlessly into the event’s agenda.
Provide Variety and Accessibility
The number of menu options you offer will depend on factors like guest count, kitchen capacity, and the type of event. For smaller gatherings (fewer than 50 guests), offering 2-3 choices per course strikes a good balance between variety and simplicity. For larger events with 100 or more attendees, keep main course options to 2-3 as well to maintain efficiency and food quality.
Your menu should appeal to a range of preferences. Include a mix of healthier options, like salads and lean proteins, alongside more indulgent choices such as sliders or gourmet sandwiches. Work with the restaurant to ensure the menu is focused enough to guarantee quality execution while still offering enough variety.
Pay special attention to vegetarian and dietary-specific dishes. These should be just as satisfying and thoughtfully prepared as the rest of the menu. For example, if the main course is herb-crusted lamb, an equally appealing vegetarian option might be a roasted portobello mushroom or vegetable Wellington – not simply a basic salad.
The service style will also influence your menu. Plated service works best for formal events, where precise presentation and portion control are important. Buffets are more budget-friendly and are ideal for dishes that hold up well over time, like casseroles or braised meats. Family-style service, which involves shared dishes, is great for communal items like roasted vegetables or sliced proteins.
Finally, aim for visual variety. A mix of vibrant colors and contrasting sauces can make the menu more visually appealing. During tasting sessions, evaluate the balance of flavors, nutrition, and presentation to ensure the menu meets your expectations.
Clarify Dish Details
Clear descriptions for each dish are essential. They help guests understand what they’re ordering and minimize confusion. Focus on the key elements: the protein, main vegetable or starch, and preparation method. For instance, instead of a vague description, write something like, "Pan-seared salmon with lemon butter, roasted asparagus, and fingerling potatoes”. This gives guests a clear idea of what to expect without unnecessary embellishments.
Allergen information is another critical detail. Use symbols or short notes to highlight common allergens like nuts, shellfish, dairy, gluten, eggs, and soy. Many menus include a legend at the bottom explaining these symbols, making it easy for guests to identify safe options quickly.
In addition to allergen labels, indicate which dishes can be modified for dietary restrictions and which are naturally compliant with common needs. This level of transparency shows consideration for all guests. You can also include a section on RSVP forms for attendees to note specific dietary requirements, which should be shared with the restaurant ahead of time.
The menu’s presentation also matters. Use high-quality materials like printed cardstock for a polished look. Choose fonts that are easy to read, with clear spacing and a logical hierarchy that guides guests through the sections. For larger events, offering both printed and digital menus can accommodate accessibility needs while reducing paper waste.
Finalize the menu and timeline about 2-3 weeks before the event. This includes portion sizes, service style, and plating instructions, ensuring everything is documented to avoid last-minute surprises. A well-organized menu and timeline set the stage for a seamless dining experience.
Step 5: Test, Refine, and Finalize the Menu
With your event goals and menu collaboration in place, the final step is all about ensuring everything runs smoothly on the big day. This involves tasting the dishes, gathering input from key stakeholders, and finalizing details with the restaurant. Skipping this step could lead to last-minute surprises – something no one wants.
Conduct Tasting Sessions
Most restaurants and caterers offer tasting sessions as part of their services, and you should make the most of this opportunity. Schedule your session at least 2–3 weeks before the event to leave enough time for any necessary tweaks. This ensures the restaurant has time to adjust recipes, source alternative ingredients, or refine preparation methods without rushing.
During the tasting, evaluate each dish for flavor, portion size, and presentation to ensure they align with your expectations and event theme. Check that dishes are served at the right temperature and pay attention to details like plating, garnishes, and overall visual appeal.
Invite key decision-makers to the tasting session, as their feedback will help confirm the menu meets your vision and guest expectations. Come prepared with questions about ingredient sourcing, preparation techniques, and service styles to address any concerns upfront.
Don’t forget to test special dietary options during this session. Ask the restaurant to prepare sample dishes for dietary needs like gluten-free, vegan, or vegetarian guests. Confirm these dishes meet the same quality standards as the main menu and inquire about food preparation practices, such as how they manage cross-contamination risks.
Use the feedback from the tasting to make precise adjustments to the menu.
Apply Feedback from Stakeholders
After the tasting, promptly review feedback to fine-tune the menu. A simple scoring system can help prioritize input, focusing on areas like flavor, portion size, and presentation. For instance, if multiple stakeholders note that a dish is overcooked or a sauce feels too heavy, those issues should take priority.
Share the feedback with the restaurant, outlining the specific changes needed. Many professional kitchens are open to making adjustments, such as refining cooking methods, tweaking flavors, swapping ingredients, or altering plating. If any dish doesn’t meet expectations, discuss substitutions or modifications. Keep in mind that too many changes at once can complicate execution, so prioritize the most critical adjustments.
To avoid confusion later, document all agreed-upon changes in writing and confirm them with the restaurant.
Confirm Final Details with the Restaurant
About 7–10 days before the event, schedule a final meeting to lock in all details. This includes confirming dish names, portion sizes, service timing, and any special requests.
Double-check portion sizes and plating details for each course, and discuss how the restaurant will maintain consistency. If possible, request photos or sketches of the plated dishes to ensure they match your expectations.
Align the service timeline with your event schedule, accounting for speeches or activities. Make sure dietary accommodations are clearly documented and tied to accurate guest counts.
Review staffing levels and the service style – whether it’s plated meals, a buffet, or food stations. If you’ve requested extras like snack stations or beverage pairings, confirm those details as well. Additionally, discuss ingredient sourcing, especially if you’ve requested local or seasonal items, and ensure the restaurant is familiar with your venue layout and any logistical constraints.
Finally, create and share a comprehensive confirmation document with all relevant parties. This document should include the finalized menu with detailed descriptions, portion sizes, plating specifications, dietary accommodations, the service timeline, special requests, and emergency contact information. Share this with your event team, the restaurant, and other vendors, and request written confirmation from the restaurant.
Set a firm deadline for menu changes – typically 1–2 weeks before the event. If an unexpected adjustment arises, contact the restaurant immediately to see if it can be accommodated without disrupting the overall plan.
Conclusion
Designing a custom event menu doesn’t have to feel overwhelming when you take it step by step. By defining the purpose of your event, understanding dietary requirements, working closely with the restaurant, organizing the menu thoughtfully, and testing everything in advance, you can create a dining experience that aligns perfectly with your event’s goals.
Strong communication between event planners and restaurants is key. When everyone is on the same page, you can address potential challenges early, ensuring that meals are served at the right temperature, dietary preferences are honored, and the pacing of service complements the event’s flow. These small but important details can make guests feel appreciated and elevate their overall experience, leaving a lasting positive impression.
Don’t forget to use feedback as a tool for growth. Each event provides an opportunity to refine your approach and strengthen your partnerships with restaurants that understand your expectations. Over time, this collaboration can lead to even smoother planning and execution.
Ultimately, personalized menu planning isn’t just about the food – it’s about creating moments that your guests will remember. When every detail is thoughtfully considered, it not only enhances guest satisfaction but also solidifies the success of your event.
FAQs
How can I make sure the restaurant accommodates all my guests’ dietary needs?
When planning your event, it’s essential to communicate your guests’ dietary needs to the restaurant early on. Provide a detailed list of any restrictions or preferences, including allergies, religious or cultural considerations, and specific dietary lifestyles like vegetarian, vegan, or gluten-free.
Check with the restaurant to see if they can customize dishes or offer alternative options. Many establishments are willing to adjust their menu or prepare special plates to accommodate these needs. Confirm these arrangements ahead of time to avoid surprises and ensure all your guests have a great dining experience.
How can I balance creativity and budget when designing a custom event menu with a restaurant?
Balancing creativity with budget when planning a custom event menu starts with open and honest communication. Begin by sharing your budget with the restaurant and outlining your vision. Whether it’s specific dishes you love or a theme you want to highlight, this conversation helps the restaurant craft options that fit both your financial plan and your creative ideas.
To manage costs without compromising on quality, think about incorporating seasonal ingredients or narrowing down the menu choices. Family-style dining or buffet setups can also be more affordable compared to traditional plated meals. By working closely with the restaurant, you can create a menu that feels special while staying within your budget.
How can I use feedback from tasting sessions to fine-tune the event menu while respecting the restaurant’s capabilities?
Feedback from tasting sessions can help fine-tune your event menu, but it’s essential to weigh guest preferences against what the restaurant can realistically handle. Instead of trying to cater to every comment, focus on spotting patterns or recurring suggestions that stand out.
When proposing changes to the restaurant, aim for tweaks that fit within their kitchen’s capabilities. For instance, rather than introducing entirely new dishes, consider adjusting or replacing an existing one. This approach keeps the menu practical while still aligning with your guests’ tastes. Maintaining clear and open communication with the restaurant is key to creating a menu that satisfies everyone involved.


